In a recent project I needed to secure a long-standing Vue.js application with Keycloak, a terrific open source identity and access management tool. Unfortunately, the Vue sample in Keycloak’s documentation is flawed. The sample refreshes the token every minute, whether or not the user performs any actions. I don’t think this behavior is very secure and certainly not going to meet realistic use cases. With this article I’m demonstrating a method more in line with the features of Vue.js.
The use case I’m describing here is one where some pages are public and some pages are protected via authentication. I’ve also added in authorization to the sample. So a user wanting to access protected content will log in using Keycloak (authentication) and also need the correct role assigned in Keycloak (authorization). This use case is similar to having a protected admin section of a public web site. I know there is much more to proper client than what I show here. This simple example is intended to be a starting point. This short video demonstrates the behavior we’ll code in this post.
TLDR; The Steps
- Configure a Client in KeyCloak
- Capture the Client ID, role name for the Client ID, and Realm name from Keycloak
- Create users in Keycloak
- Create a plugin in the Vue app
- Integrate the plugin into app startup
- Set routes to be authenticated
- Create a navigation guard that manages authentication and authorization to protected resources.
Keycloak Configuration
If you have not set up or configured Keycloak previously, check out my article demonstrating how to run Keycloak locally using Docker. I’m assuming you are running a Keycloak instance, have admin rights to the Keycloak administration app and have already created a Realm. The main tasks to complete for this example are creating a Client application registration and adding users in Keycloak. If you know how to do this just skip down to the code section, otherwise let’s get to work with Keycloak.
Create A Client in Keycloak
A Client in Keycloak is a way to register an app to be secured. The Vue app we create needs to have a corresponding Client ID. Make sure to keep track of the Realm name for later in our Vue code. Click the Clients link in the left navigation pane under the Realm you are using to see the existing clients and create a new one.
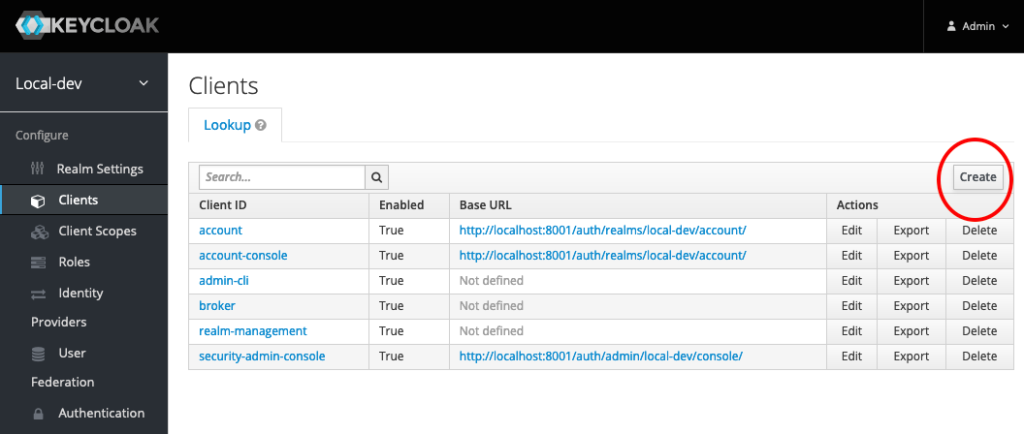
Click the Create button at the top left of the table of existing Clients to add a new Client for your app. In my case, I’m going to create a Vue app to demo logging in with Keycloak.
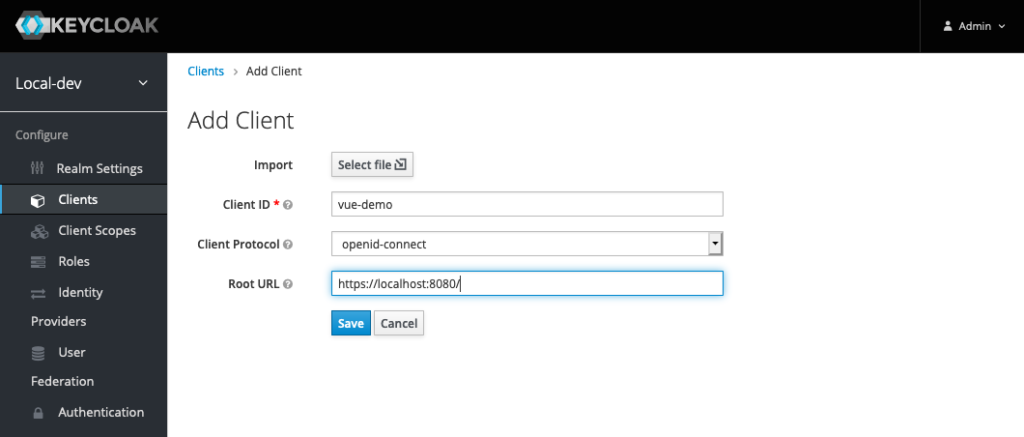
Set the client id as the name of your app, and set the Root URL to the URL you are using for local development of your Vue application. In my case, the URL is http://localhost:8080. Click the Save button. Make sure you get the protocol correct. If you get an http/https mismatch you’ll have issues later on.
In the Client details page, make sure the Client Protocol is set to openid-connect and the Access Type is set to public. Check that the following are set properly:
| Property | Value | Reason |
| Root URL | http://localhost:8080/ | Gets prepended to redirected URLS |
| Valid Redirect URIs | http://localhost:8080/* | Redirect location after logout |
| Web Origins | http://localhost:8080 | Allowed origin for CORS (Really important for web apps) |
Create A Role
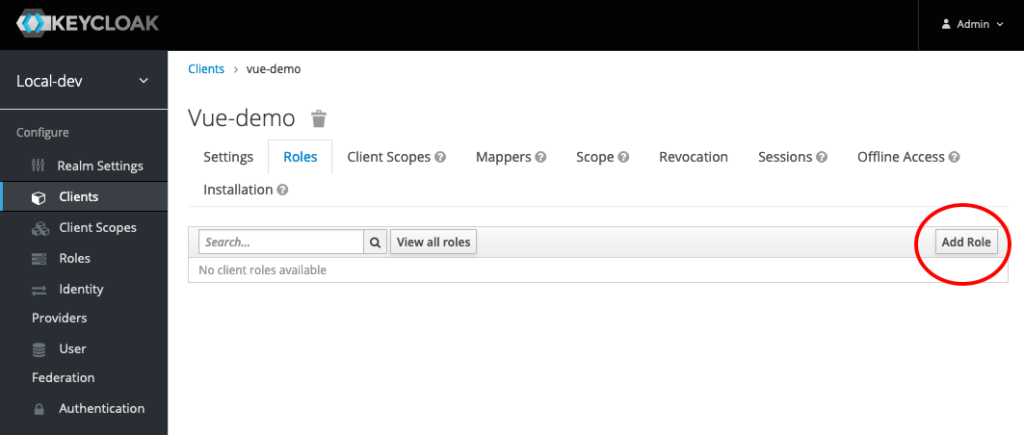
Each Client needs one or more roles. If you don’t assign roles and check them in your application, any user from your Realm will be able to log into the app. You should create roles to control user access. Click the Roles tab in your Client details page. In the Roles tab, click the Add Role button at the upper right of the table. Give your role a name and save it. We’ll need the role name for later in our Vue app.
Create Users
We need users to log into our application (Client). For this demo we’ll create two users. One user with the role we just created and one user without. We will create a user and then assign a password and role. Click the Users link in the left navigation pane to get started.
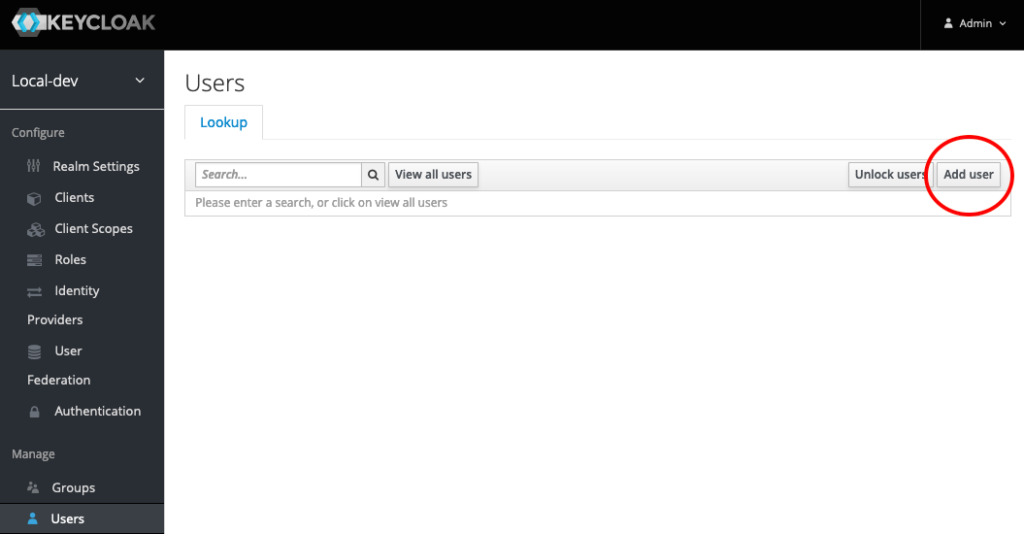
You won’t see any users listed, even if you added some previously. Click the Add user button in the top right of the table.
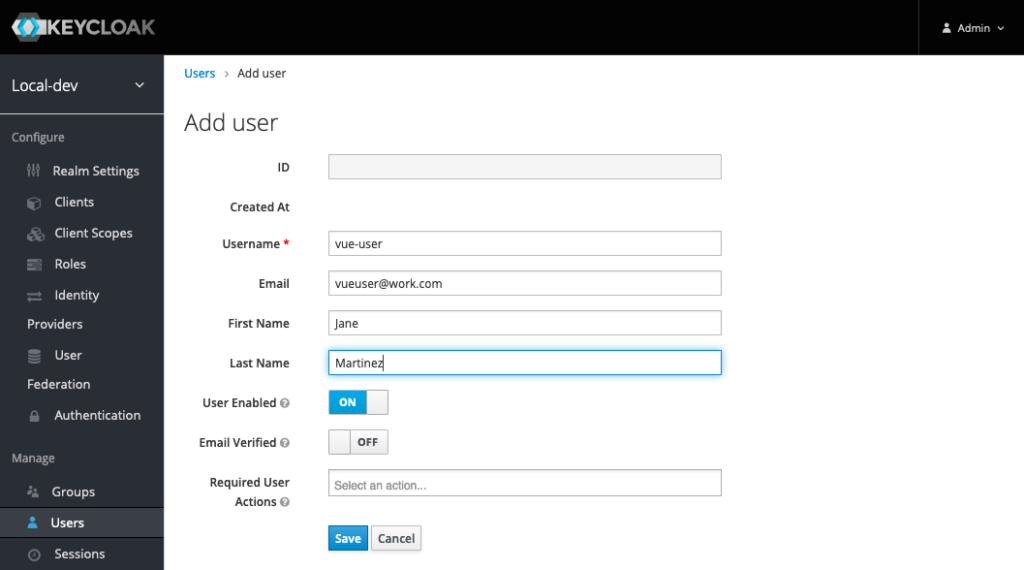
Enter a username, and their actual name and email. Click the Save button. Let’s give them a password.
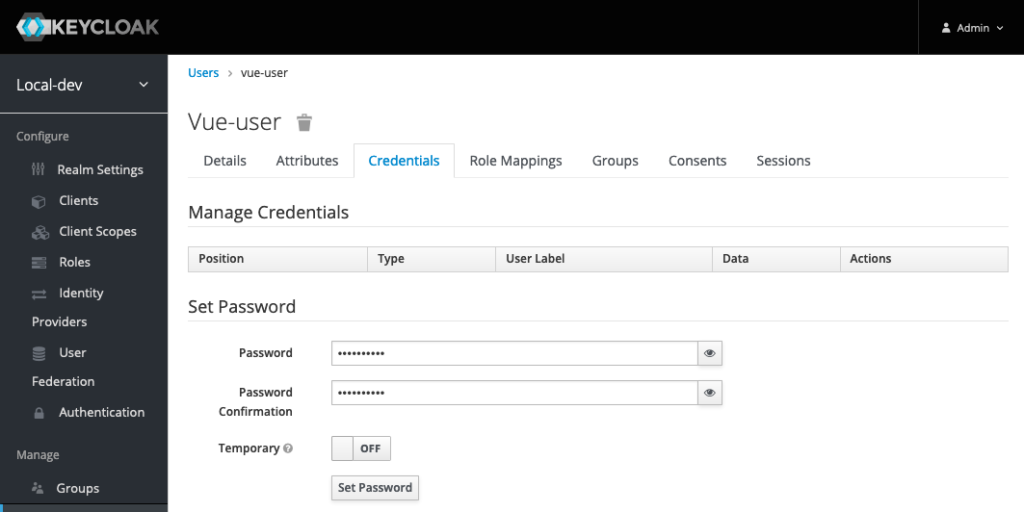
On the user details page, click the Credentials tab. Give the user a password. If you don’t want the user to be forced to change their password, turn the Temporary switch to off. I’ll do this when I’m running locally for development, but not when making accounts for actual users in a non-development environment. Click the Set Password button.
Assign A Role
Since the application (Client) has a role, we need to assign that role to the user so they can log into that application. Click the Role Mappings tab.
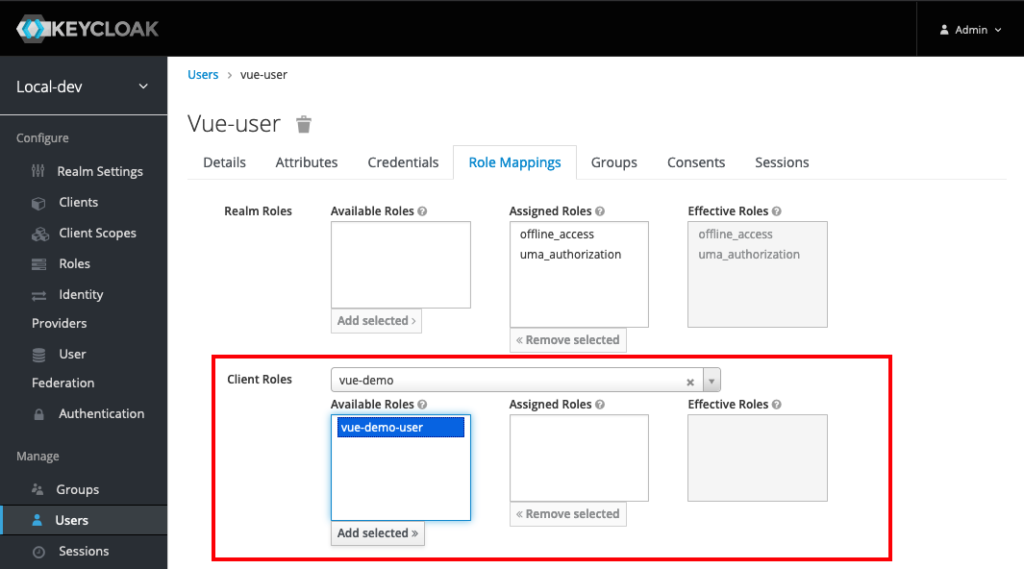
Select your client created earlier in the Client Roles drop down list. The role created earlier should be there. Select that role and click the Add selected > button. The user is good to go now.
Create a second user following the same steps, but do not assign any role to this user. Now, let’s get coding in Vue.
Vue Setup
You can find the sample code I wrote for this article at GitHub. I made a simple application with the Vue-cli and edited that app.
We will use the library provided by Keycloak to build our authentication plumbing. It’s very important that the version of the library you install matches the version of the Keycloak instance you are working with. You can install it using npm, my Keycloak instance is version 12.0.4:
npm install --save keycloak-js@12.0.4
You can also find the JavaScript library in your Keycloak instance. It’s located at <yourServerUrl>/auth/js/keycloak.js
Create A Plugin
In order to make the Keycloak object accessible throughout the application, I created a Vue plugin. The plugin is going to create a global $keycloak object we can reference anywhere in the app. The code for the plugin looks like:
import Vue from 'vue'
import Keycloak from 'keycloak-js'

const options = {
  url: 'http://localhost:8001/auth/',
  realm: 'local-dev',
  clientId: 'vue-demo'
}

const _keycloak = Keycloak(options)

const Plugin = {
  install(Vue) {
    Vue.$keycloak = _keycloak
  }
}

Plugin.install = Vue => {
  Vue.$keycloak = _keycloak
  Object.defineProperties(Vue.prototype, {
    $keycloak: {
      get() {
        return _keycloak
      }
    }
  })
}

Vue.use(Plugin)

export default Plugin
The important bits to note are in the options object. The url must be the Keycloak base server URL using the /auth/ directory. The realm and clientId came from the configuration of the Client in Keycloak steps above.
The next step is to initialize the Keycloak object from the plugin before starting the Vue app in main.js. So your main.js file should look something like this:
import Vue from 'vue'
import App from './App.vue'
import router from './router'
import authentication from "@/plugins/authentication"

Vue.config.productionTip = false
Vue.use(authentication)

Vue.$keycloak
  .init({ checkLoginIframe: false })
  .then(() => {
    new Vue({
      router,
      render: h => h(App)
    }).$mount('#app')
  })
This only sets up Keycloak. It does not yet protect secured content. If you want your app to always force a login and have no public content, change the .init function to use login-required upon onLoad:
.init({ onLoad: 'login-required', checkLoginIframe: false })
Create A Navigation Guard
In order to secure the pages we want behind a login, we have to create a navigation guard, a feature in Vue intended for just this purpose. But, we need a way to tell which pages are the unsecured and secured pages. We do this by setting a meta tag in our Vue router configuration file:
const routes = [
  {
    path: '/',
    name: 'Home',
    component: Home,
    meta: {
      isAuthenticated: false
    }
  },
  {
    path: '/secured',
    name: 'Secured',
    meta: {
      isAuthenticated: true
    },
    component: () => import('../views/Secured.vue')
  },
  {
    path: '/unauthorized',
    name: 'Unauthorized',
    meta: {
      isAuthenticated: false
    },
    component: () => import('../views/Unauthorized.vue')
  }
]
In the above code the home page and unauthorized message page are not secured. But the page named ‘Secured’ is secured. The navigation guard will check this property and redirect users to login when necessary. So we create this function in the Vue router which is a global navigation guard:
router.beforeEach((to, from, next) => {
  if (to.meta.isAuthenticated) {
    // Get the actual url of the app, it's needed for Keycloak
    const basePath = window.location.toString()
    if (!Vue.$keycloak.authenticated) {
      // The page is protected and the user is not authenticated. Force a login.
      Vue.$keycloak.login({ redirectUri: basePath.slice(0, -1) + to.path })
    } else if (Vue.$keycloak.hasResourceRole('vue-demo-user')) {
      // The user was authenticated, and has the app role
      Vue.$keycloak.updateToken(70)
        .then(() => {
          next()
        })
        .catch(err => {
          console.error(err)
        })
    } else {
      // The user was authenticated, but did not have the correct role
      // Redirect to an error page
      next({ name: 'Unauthorized' })
    }
  } else {
    // This page did not require authentication
    next()
  }
})
The navigation guard handles four use cases:
- The page requires authentication and the user is not authenticated
- The page requires authentication, the user is authenticated and has the correct role (authorized). Update their token.
- The page requires authentication, the user is authenticated but not authorized. Redirect them to an error page.
- The page does not require authentication
This is all the code necessary for simple login behavior. You can see in the sample code I’ve included Login and Logout buttons and those are really one-line functions from the Keycloak object.
Now we have an app demonstrating simple authentication and authorization using Keycloak. There are three places we added Keycloak integration into an app: a Vue plugin, wiring up the plugin in main.js, and in the Vue router. The sample could certainly be expanded upon and would need more functionality, especially if the app is calling API’s. This article shows how to refresh the token when using Axios using an interceptor. I hope this more Vue-centric sample helps out some folks trying to get their Vue app integrated with Keycloak.