Keyloak is an open source identity management tool. If you are learning how to make your app use authentication, it’s an ideal tool if you don’t have any other source. It’s straightforward to learn and setup, yet hast pretty sophisticated features to grow into. For this article, we are going to set up Keycloak to run locally using Docker.
TLDR; The Steps
Assuming you have Docker installed locally, these are the general steps to set Keycloak up for local use:
- Pull and launch the Docker image
- Set up a realm
- Create a client (app registration)
- Create a role for the users of the client
- Create users
- Assign users to the role
Docker
We will run the Docker container locally. The admin account gets created when creating the container. For this demonstration I’m just going to use admin/admin for the username and password. Don’t do that if you install Keycloak outside of your box, create a strong password. Run this Docker command on the command-line to launch Keycloak:
docker run --name keycloak-dev -d -e KEYCLOAK_USER=admin -e KEYCLOAK_PASSWORD=admin -p 8001:8080 quay.io/keycloak/keycloak:18.0.1
For this sample I’m using version 12.0.4, which will probably be out-of-date when you try this. So things can change, be aware these steps may no longer match in the future. The admin user gets created by the environment variables. The -d flag runs the container in the background and frees up your command line. Keycloak will start up using an embedded H2 database. If you destroy the container you’ll lose all your configuration. In a real deployment I’d use a container running PostGREs to store the data. For local development the embedded database is fine and much quicker to set up.
Keycloak will be running on port 8001 at http://localhost:8001. You’ll have to wait a bit for Keycloak to spin up. You can always check the log using:
docker logs keycloak-dev
When you see a message similar to “Keycloak 12.0.4 (WildFly Core 13.0.3.Final) started in 18938ms” you know it’s ready.
Set Up a Realm
Open http://localhost:8001 in your browser. You should see the staring screen.
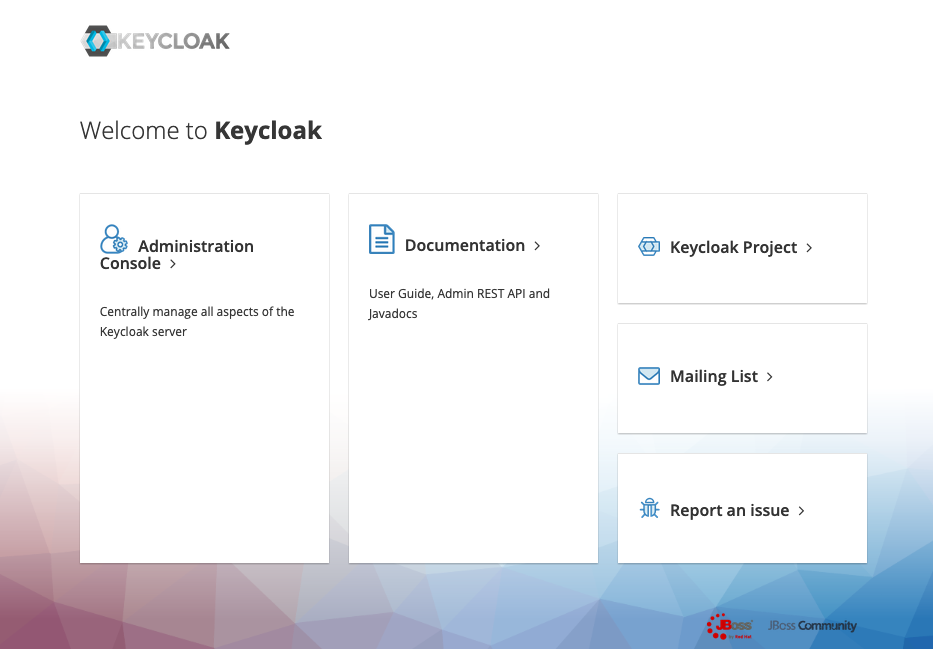
Click the Administration Console link. Log in with the credentials used to create the Docker image above. Let’s create a Realm, which is a container for the apps you want to protect behind Keycloak. At first login you will be in the master realm, and you should not use that for your apps.
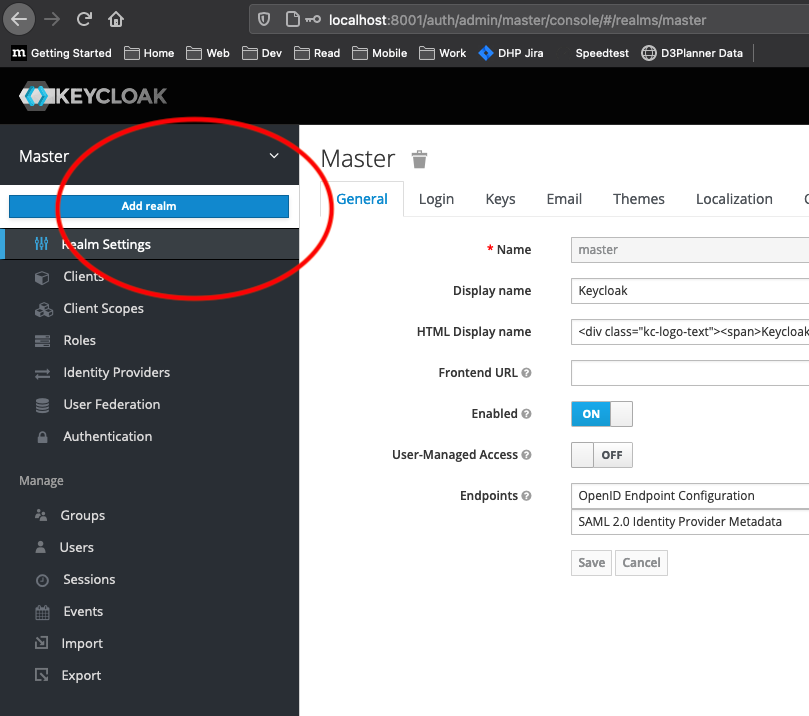
Click the drop-down arrow next to the Master realm name in the left navigation pane, then click the Add Realm button. Give the realm a name and remember it for later, you’ll need it when configuring an app to authenticate using Keycloak.
Create A Client
Click the Clients link in the left navigation pane.
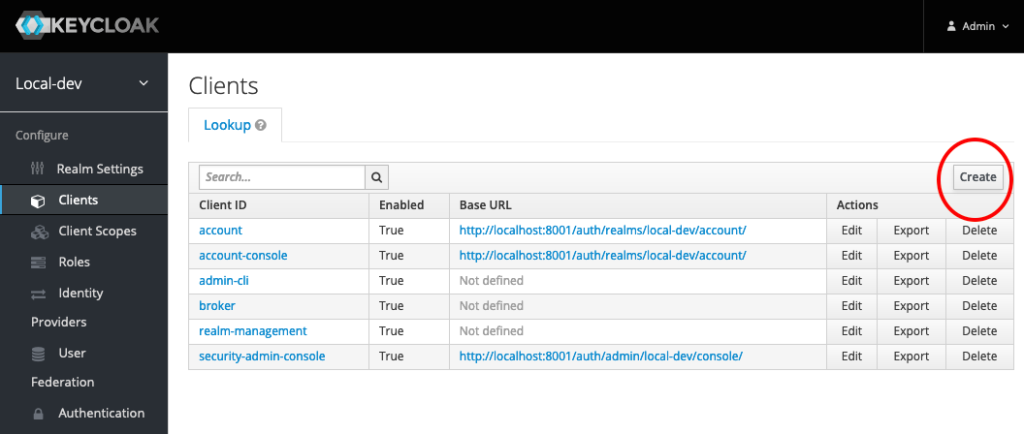
Click the Create button at the top left of the table of existing Clients to add a new Client for your app. In my case, I’m going to create a Vue app to demo logging in with Keycloak.
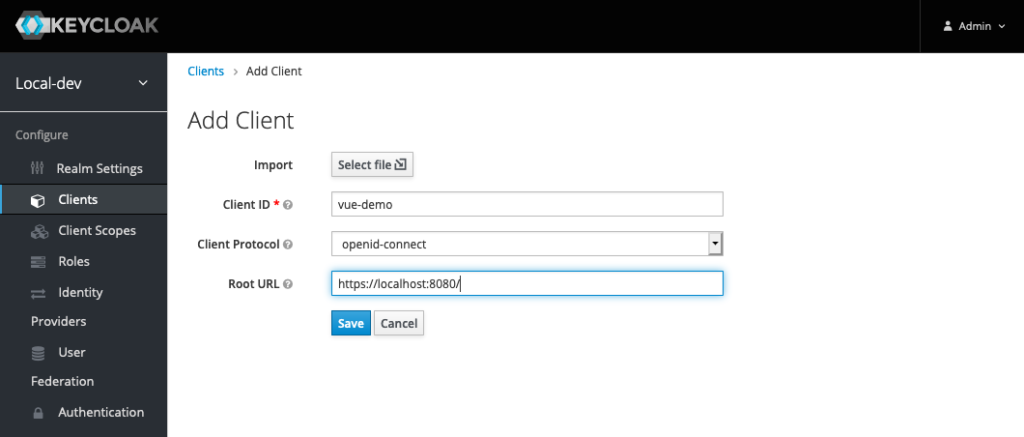
Set the client id as the name of your app, and set the Root URL to the URL you are using for local development of your application. In my case, http://localhost:8080. Click the Save button.
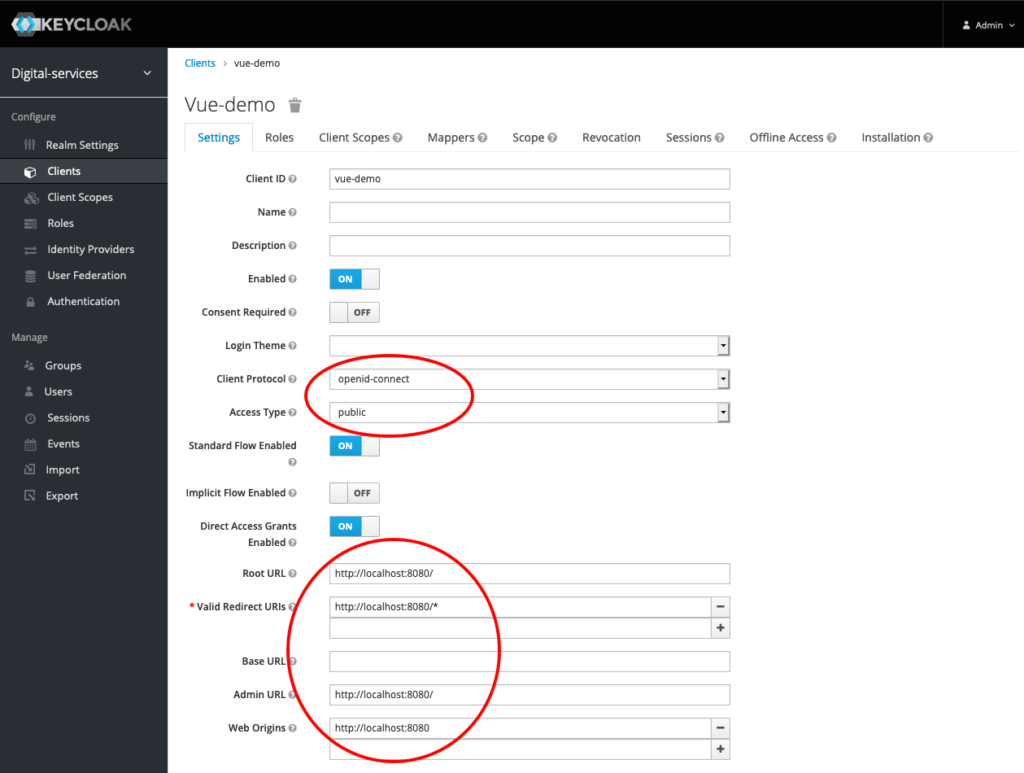
In the Client details page, make sure the Client Protocol is set to openid-connect and the Access Type is set to public. Check that the following are set properly:
| Property | Value | Reason |
| Root URL | http://localhost:8080/ | Gets prepended to redirected URLS |
| Valid Redirect URIs | http://localhost:8080/* | Redirect location after logout |
| Web Origins | http://localhost:8080 | Allowed origin for CORS (Really important for web apps) |
Save the details and lets add a Role to our Client.
Create A Role
Each Client needs one or more roles. If you don’t assign roles and check them in your application, any user from your Realm will be able to log into the app. You should create roles to control user access. Click the Roles tab in your Client details page.
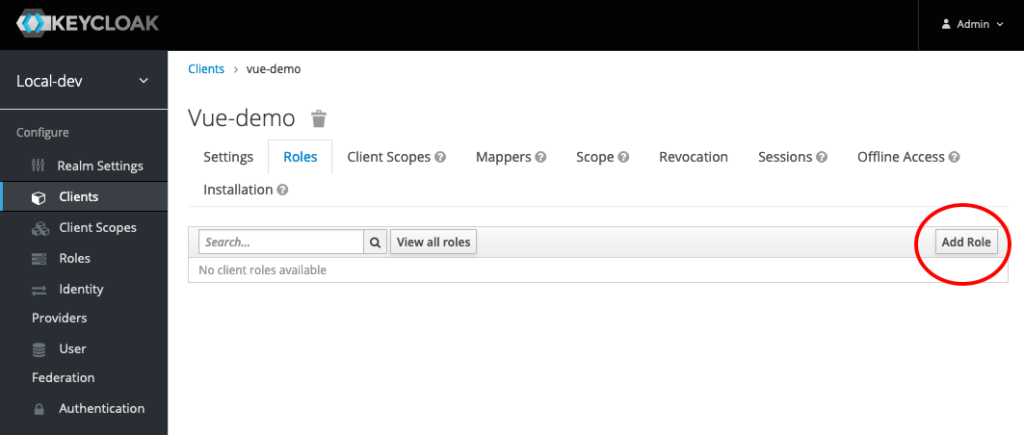
In the Roles tab, click the Add Role button at the upper right of the table. Give your role a name and save it.
Create Users
We need users to log into our application (Client). We will create a user and then assign a password and role. Click the Users link in the left navigation pane.
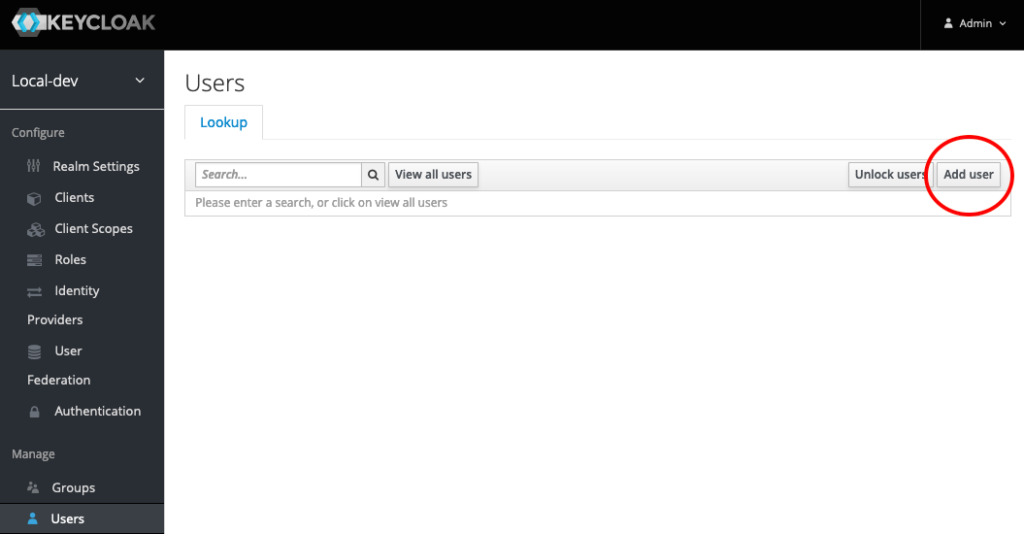
You won’t see any users listed, even if you added some. Click the Add user button in the top right of the table.
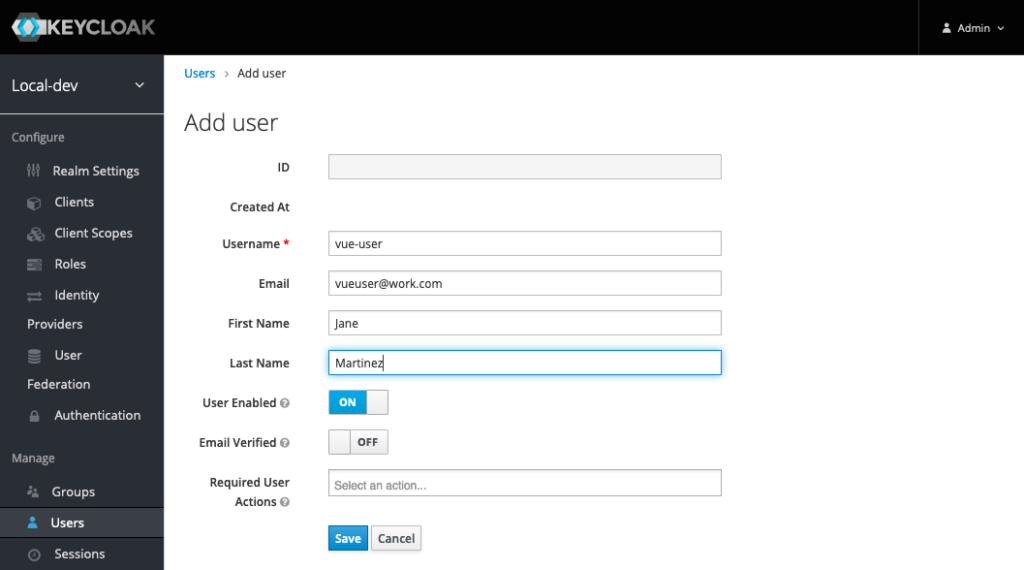
Enter a username, and their actual name and email. Click the Save button. Let’s give them a password.
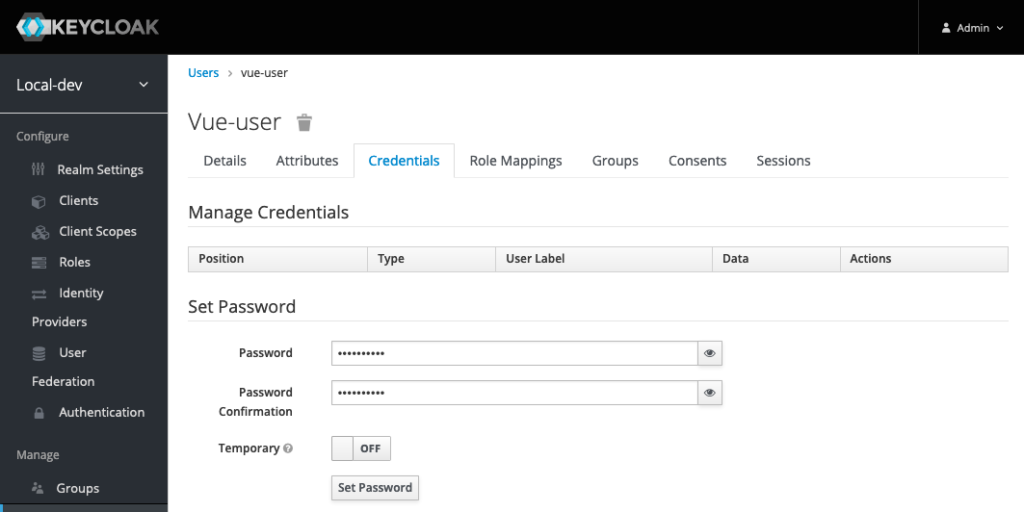
On the user details page, click the Credentials tab. Give the user a password. If you don’t want the user to be forced to change their password, turn the Temporary switch to off. I’ll do this when I’m running locally for development, but not when making accounts for actual users in a non-development environment. Click the Set Password button.
Assign A Role
Since the application (Client) has a role, we need to assign that role to the user so they can log into that application. Click the Role Mappings tab.
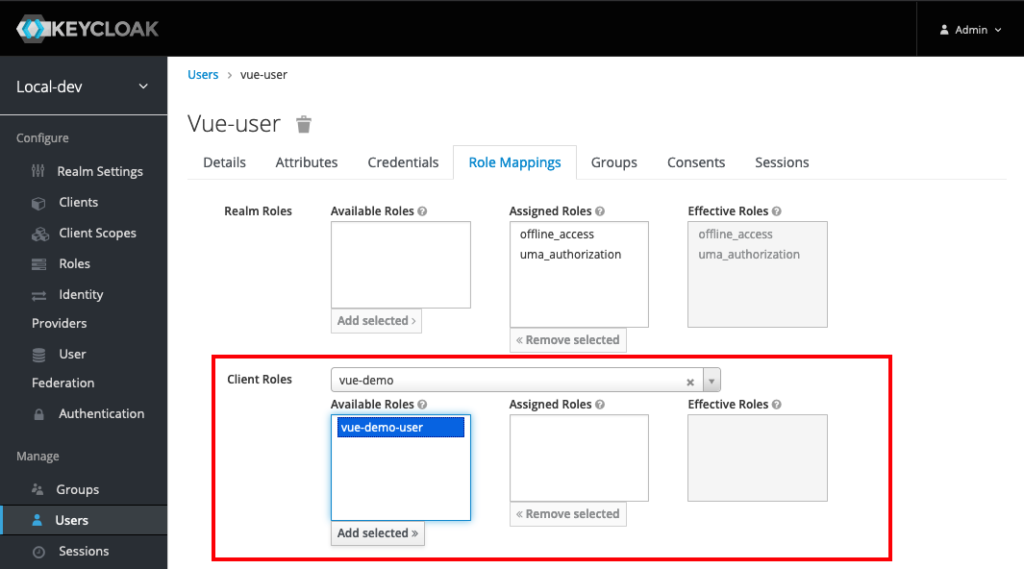
Select your client created earlier in the Client Roles drop down list. The role created earlier should be there. Select that role and click the Add selected > button. The user is good to go now.
The next step is to wire up an application to log in using this local instance of Keycloak.